|
|||||||||||||||||||||||||||||||||||||||||||||||||||||||
|
|
|
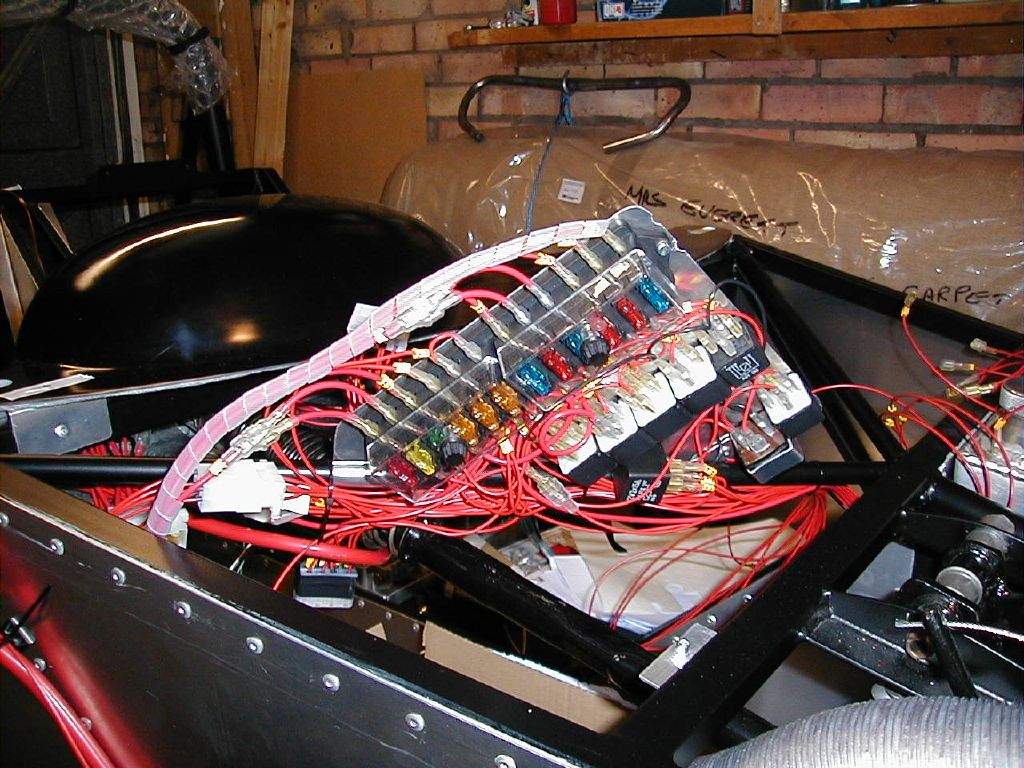
1st Feb: 5h30m: Continued spiral binding the loom, so that the separate runs to the rear corners are now all wrapped too. I'm really pleased with how this is looking now- the spiral binding is from Maplin Electronics and is pretty cheap at £2.49 for 10m!
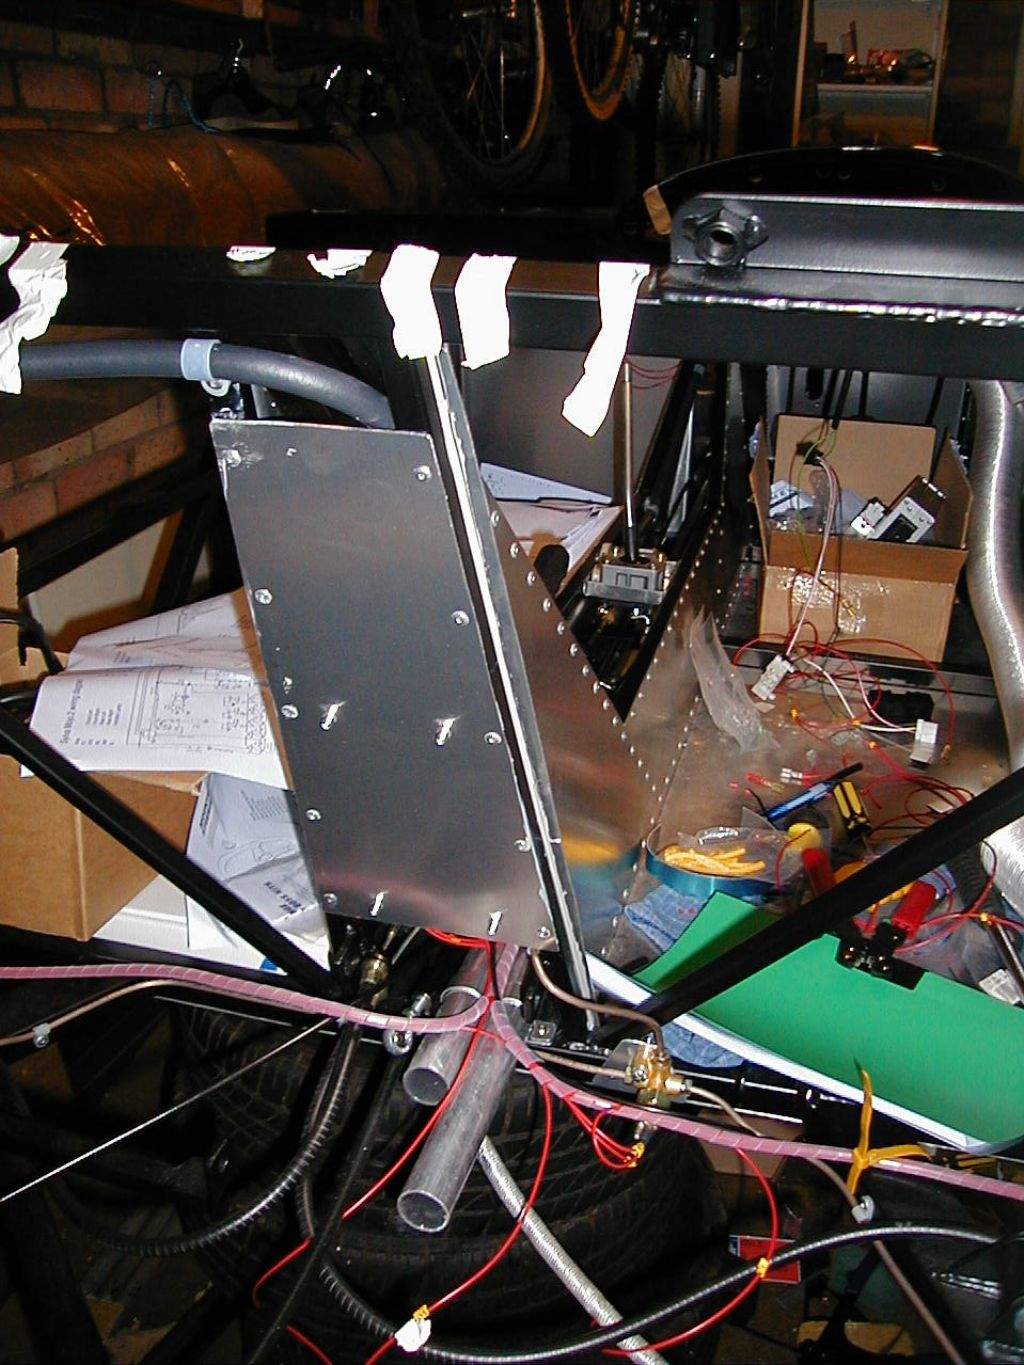
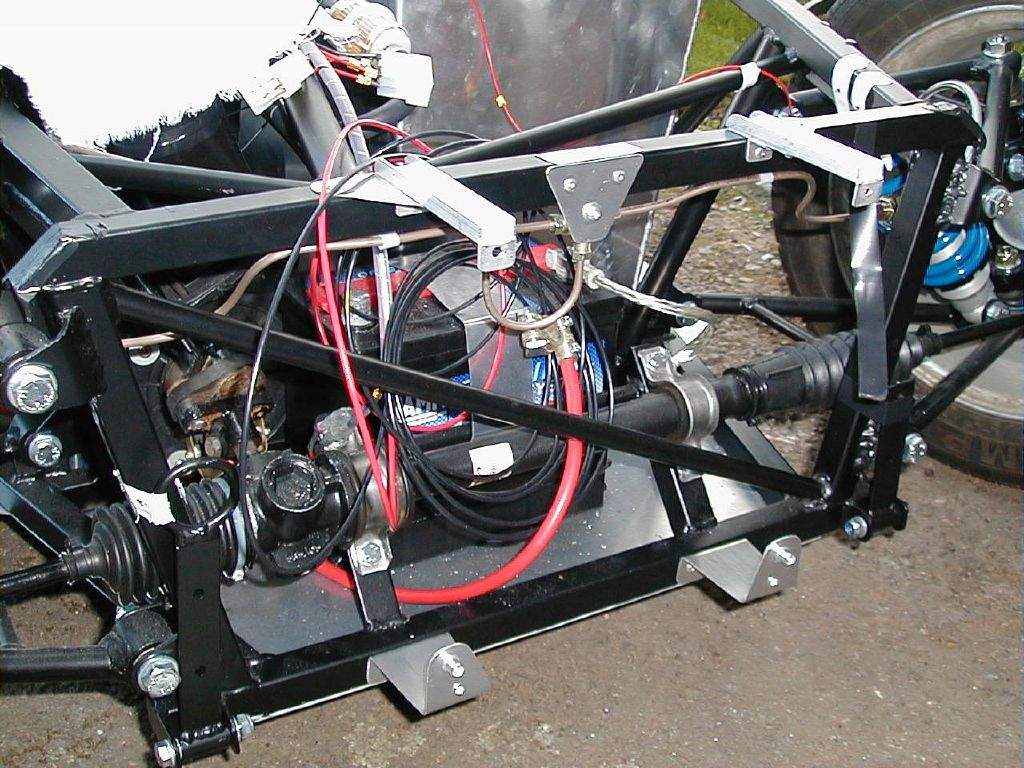
I'm planning to get the engine fitted within the next few weeks, so I need to do various jobs that will be difficult once that lump is sat in the back! First of these was to sort out the mounting of the ECU. I wanted to locate the ECU in the rear of the tunnel, mounted on two angle brackets which in turn fit with rivnuts to a panel across the rear of the tunnel. This panel does not completely cover the end of the tunnel due to all the gubbins that runs along this route, but it should help to keep out road grime and dampness. An extra relay is also mounted to the panel, this is controlled by the ECU, and switches the main feed to the coil pack from a take off that will wire to the main battery feed at the starter.
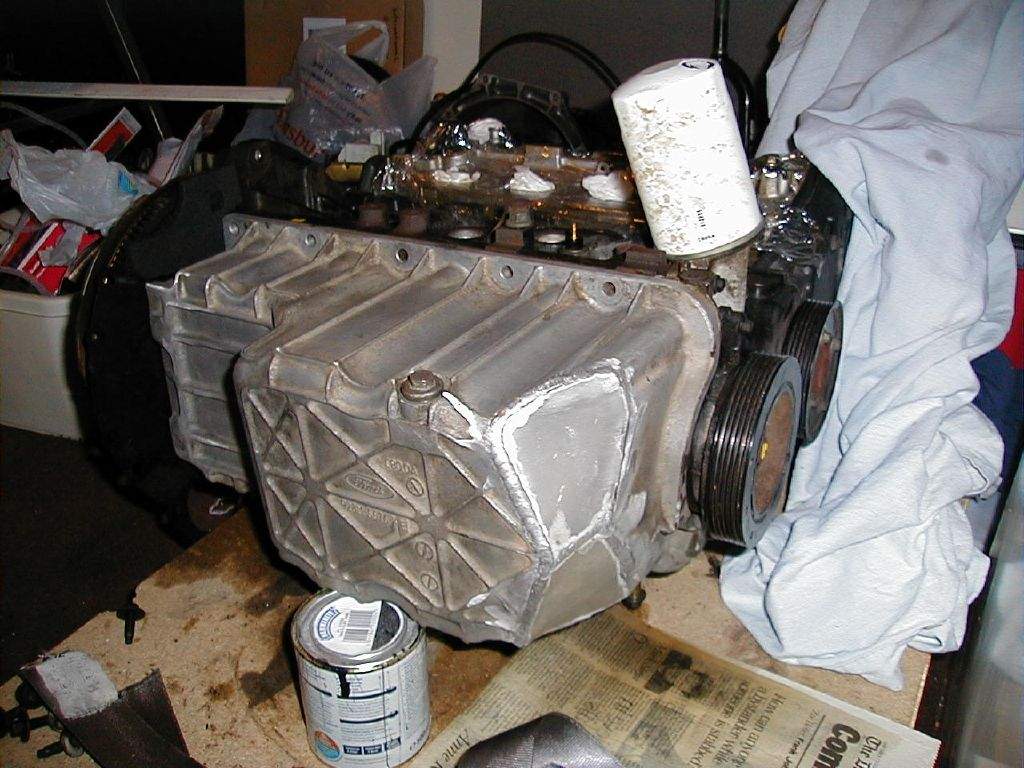
2nd Feb: 2h00m: Wired up some connections from the main loom to the ECU multiplug. These are things like the relay controls for radiator fan and fuel pump, and the tacho driver, that I had included in the main loom. I'll make up a separate loom from the ECU to the engine connections once the engine is actually in! Cleaned up the second modified sump that had now arrived back from Sylva. This seemed even grimier than the previous one on the outside, and a few brillo pads were therefore brought into action! Ideally I'd like to get the sump cleaner still, aluminium castings always look better when they shine! But, for the time being, it is good enough to fit back onto the block. 3rd Feb: 1h00m: Bought some wheel nuts and bolts in preparation for dropping the car off the stands (planned for this coming weekend). I've not converted the rear to studs as I couldn't really see a problem with mixing nuts at the front with studs at the rear (the only real issue is the ease of wheel fitting that studs give you). Gave the sump a final internal clean, and then fitted the sump back onto the block. This required the use of some small beads of sealant at each corner, as the block does not sit completely flush with the water pump housing at one end, and with the crankshaft oil seal at the other. This is documented in the Haynes manual.
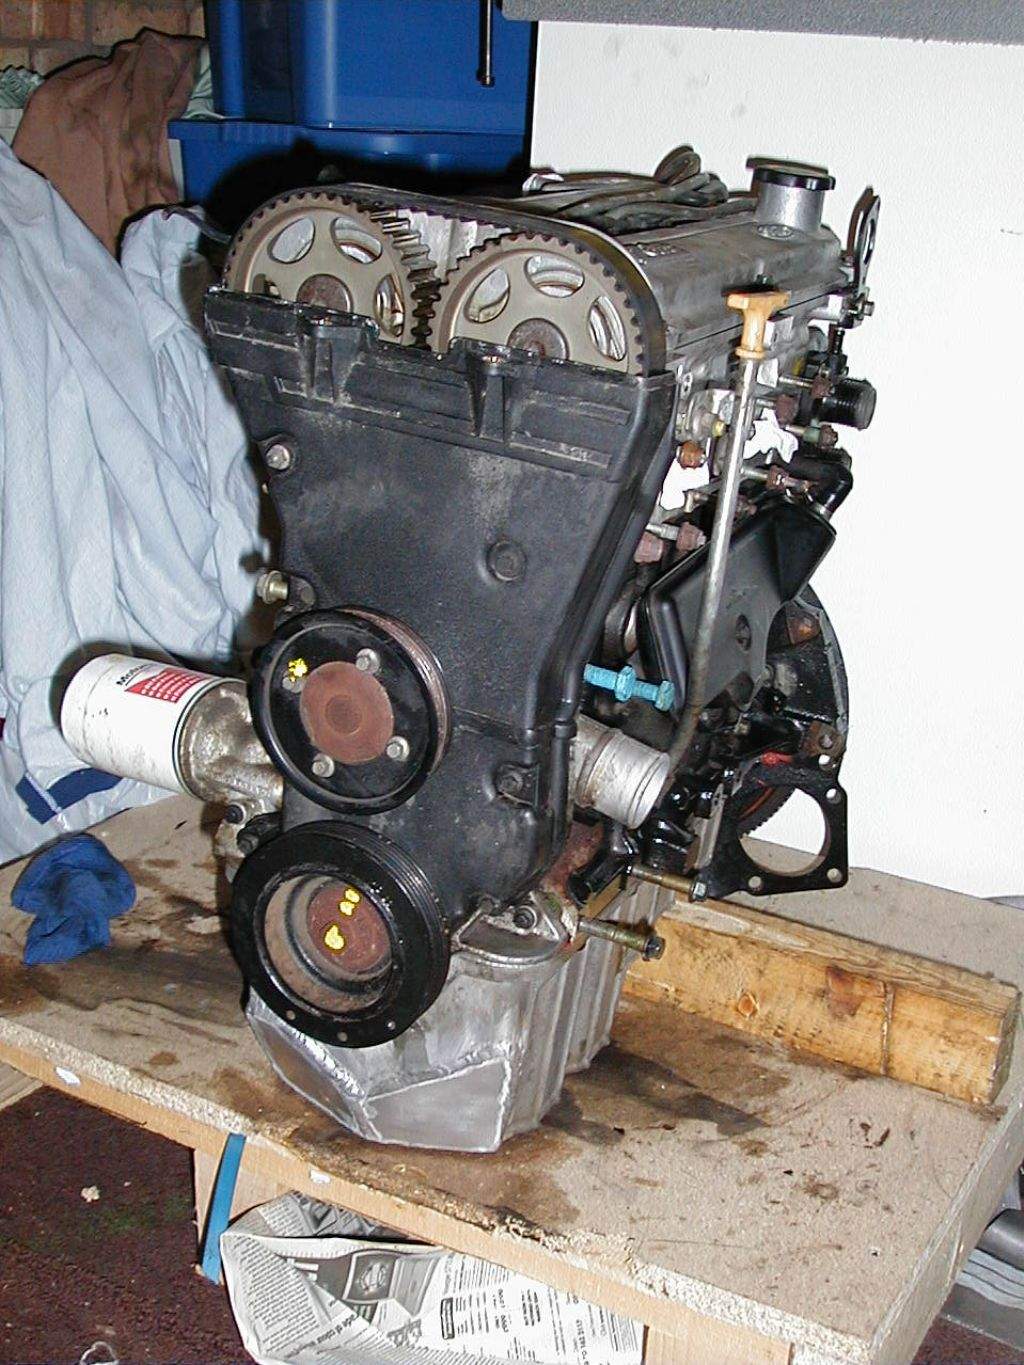
4th Feb: 1h30m: Changed the cambelt! This was a much easier job than I'd thought, as the camshafts can be locked in place very easily after removing the cam cover- I used a metal spirit level as a locking bar! 5th Feb: 1h00m: Started to clean the cam cover, which proved to be a bit of a pain. Ideally I was going to leave it in its 'natural' state, but was hoping for a fairly shiny finish- however, even after a good scrub and attempts at polishing with Autosol, it's still a bit dull looking for my liking. I am considering spraying it, but not sure what colour... 6th Feb: 3h00m: Paid a visit to the local scrapyard again. Quite a successful afternoon, as I picked up the following:
Also ordered a few bits at the local Ford dealers. Once back home, I had a bit of a sort out in the garage, which has become a bit of a tip, in preparation for getting the Mojo off the stands on Sunday! Also rigged up the horn connector from the Sierra- it works perfectly!
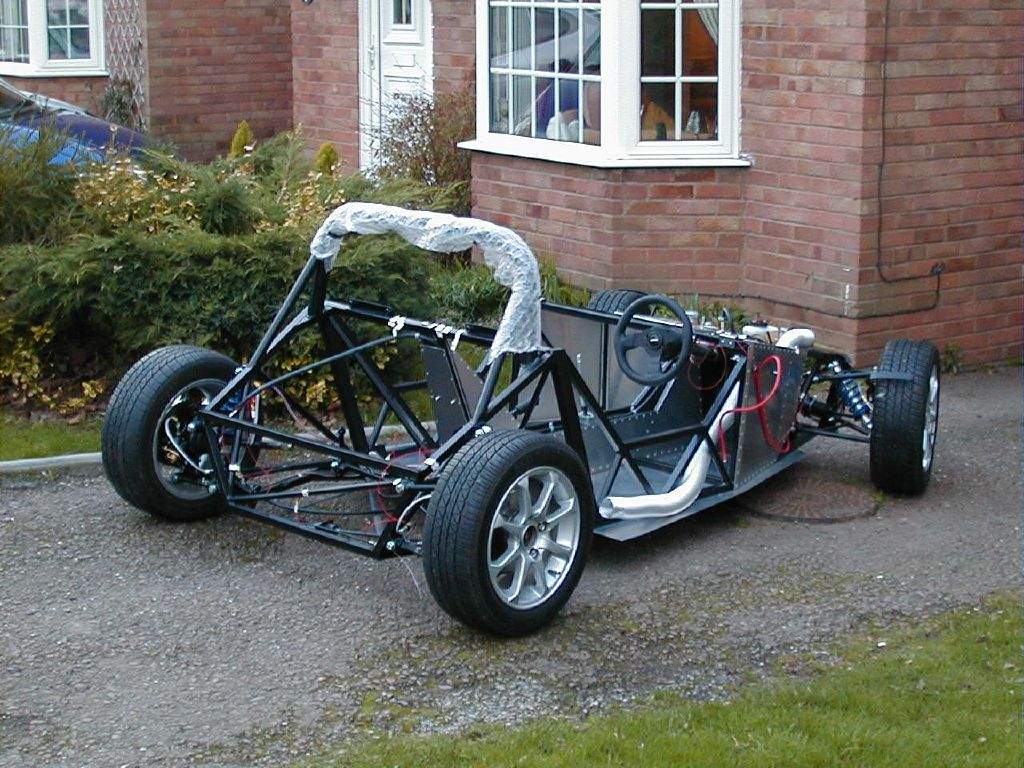
7th Feb: 2h00m:Realised that the Sierra steering column electrical connector for the horn was not quite working correctly (horn functionality being dependant on the steering wheel angle probably won't pass SVA!), so had to tweak the position of the column outer and inner and also the electrical contacts to get things to work. This meant the dash cutout around the column no longer fitted, so out came the dremel multitool again to make things fit. Then continued with the clear up operation in preparation for tomorrow… 8th Feb: 7h00m: Spent some time in the morning finishing clearing up- wow, there is a carpet in the garage after all! It's not been visible for some time… Re-bled the brakes before fitting the wheels (the rear callipers have to be unbolted from the uprights to bleed correctly, so it's best done now!). At 2.30 a load of friends arrived to help lift the car down- thanks to everyone (you know who you are!) for the muscle power! This went without a hitch, and we then spent quite a while gawping at how small the Mojo looked now it was on the floor. The dash top is just above my knee when I stand next to it! Once everyone had left, I spent some more time sat behind the steering wheel. This car is going to be low!
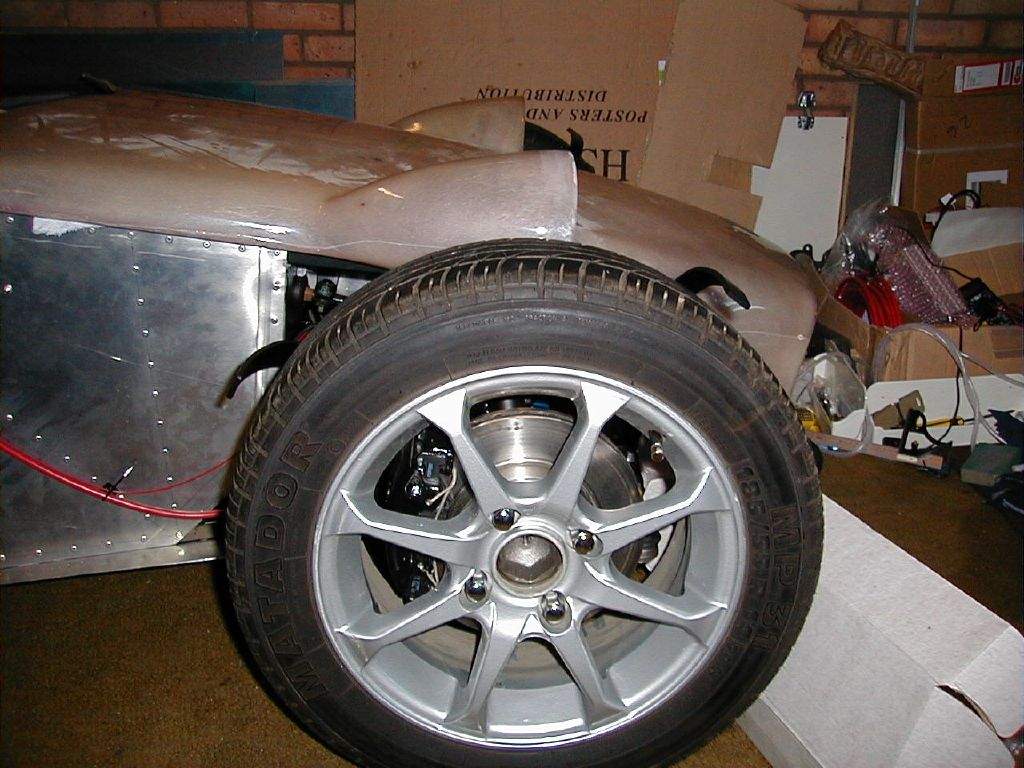
Once I'd stopped dreaming of driving the Mojo on a hot summers day, got back down to some work… -Fitted the dash top mount rivnuts and bolts -Drilled a final hole in the dash for the newly acquired super-bright red LED shiftlight (hadn't intended having one, until I decided on the Emerald ECU which has as standard a shiftlight output, hence had to find a space on the dash!) -Made a small bracket to secure the heater duct as it passes above the drivers footwell. -Had a further think about an idea Jeremy Philips had given me a while ago- mounting a shelf in the top half of the footwells, above the driver's/passenger's feet & lower legs. As stowage space is very limited in the Mojo, I'm keen to make use of any nooks and crannies that I can find. I'd make the shelf removable, so it can be fitted as and when needed. Anyway, to assess how practical it would be, I made up a cardboard template before calling it a day and crashing in front of the TV for an hour… 9th Feb: 1h00m: Pushed the Mojo out onto the driveway for some better piccies:
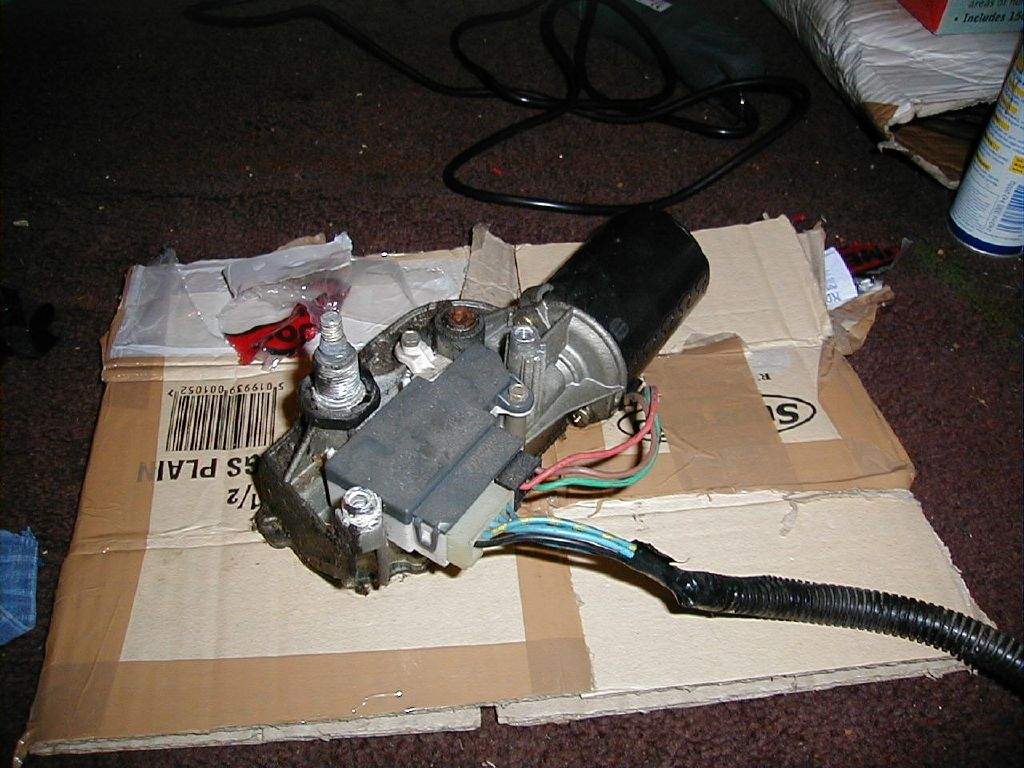
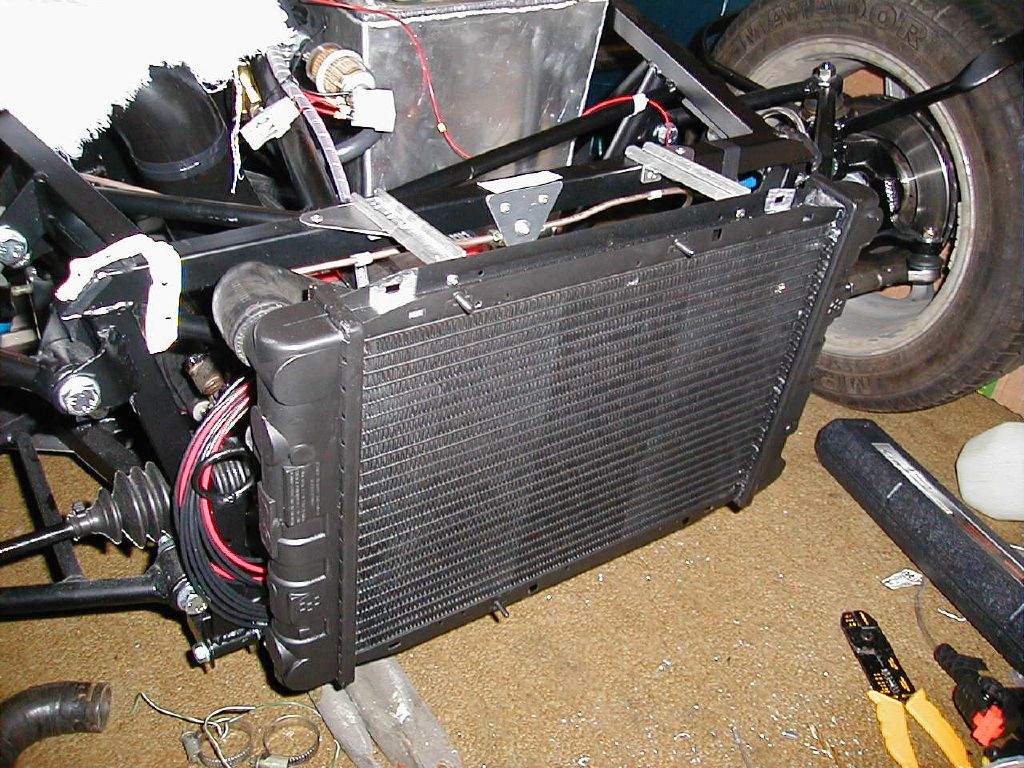
Took a closer look at the wiper mechanism to try and work out what the 5 wires are supposed to connect to- I think I'm going to need a look at a Haynes manual! 10th Feb: 1h00m: Got hold of a Fiat Uno wiring diagram in order to test the wiper motor. The one I've got seems to have a 'fast' and an 'intermittent' speed, not quite what I expected, but actually quite handy, as all the intermittent electronic jiggery-pokery is enclosed within a little plastic housing attached to the wiper mechanism. 11th Feb: 1h30m: Decided it was time to do some more work on the engine in preparation for getting it installed in the not too distant future. I unbolted the old clutch cover, and removed the clutch from the flywheel. The flywheel friction surface had some surface rust which I cleaned off. I then offered up the new clutch and cover plate, at which point I realised the new clutch and cover were smaller than the original! At first I guessed I had been given the wrong replacement part, but just to check, I dug up from the web what diameter clutch should be fitted to 1800 zetecs of Escort origin- 220mm. My replacement clutch was 220mm. Oh dear. Tape measure on the old clutch revealed that my engine had a 240mm clutch, and correspondingly different flywheel- and frustratingly, a flywheel that will not fit into the bellhousing of the gearbox. Hmm. Looks like I'm going to be after a new flywheel then! 12th Feb: Spotted a WSCC member who had advertised a 1.8 zetec flywheel in early January, so emailed to find out whether it had been sold. Result! It was still available, and was only 45mins up the M6. 14th - 22nd Feb: I was away holidaying in Spain all week, so no work on the Mojo! 25th Feb: 2h00m: Decided that I could probably make a start at fitting the radiator. This means taking an educated guess at where the bonnet is going to sit, and then trying to accommodate the radiator within the nose. I attached some bits of radiator hose to the radiator which enabled me to wedge it at a variety of angles, so I could then trial fit the bonnet to see how things looked. This proved to be a lengthy process, and I didn't really find a solution I was happy with.
26th Feb: 2h30m: Spent even more time fiddling with radiator mount positions. Finally came up with a new solution that I was happy with, routing the top radiator hose firstly downwards and then through the front of the chassis, rather than over the top rail as I had previously planned. Started to devise the brackets to hold it all in place. 27th Feb: 3h00m: Realised that I could improve the radiator mounting by cutting down one of my rubber radiator hoses slightly. Then continued with the top radiator mounting brackets.
28th Feb: 2h00m: Picked up my flywheel in the morning, it's in very good condition compared with the one originally fitted to my engine, so I was happy with the deal- £20 including 6 brand new flywheel bolts. Combined the trip with a visit to Stafford Vehicle Components to pick up a 'budget' radiator fan- again good value at £30 compared with anything else I've seen (I was loathed to fit a scrapyard fan).
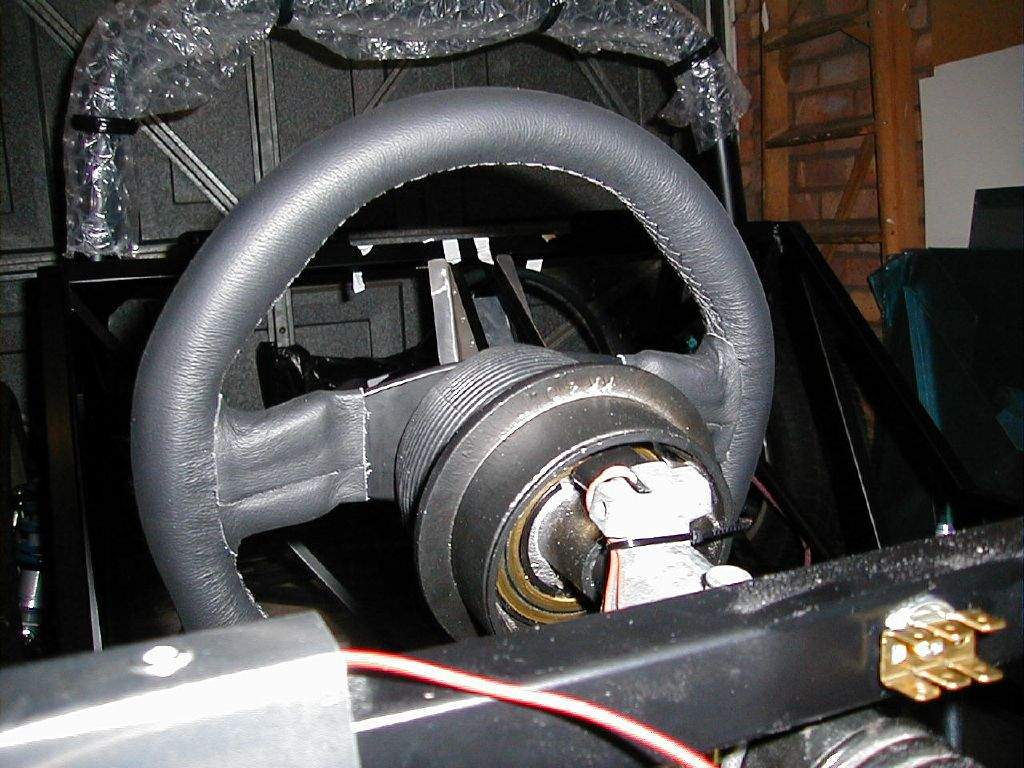
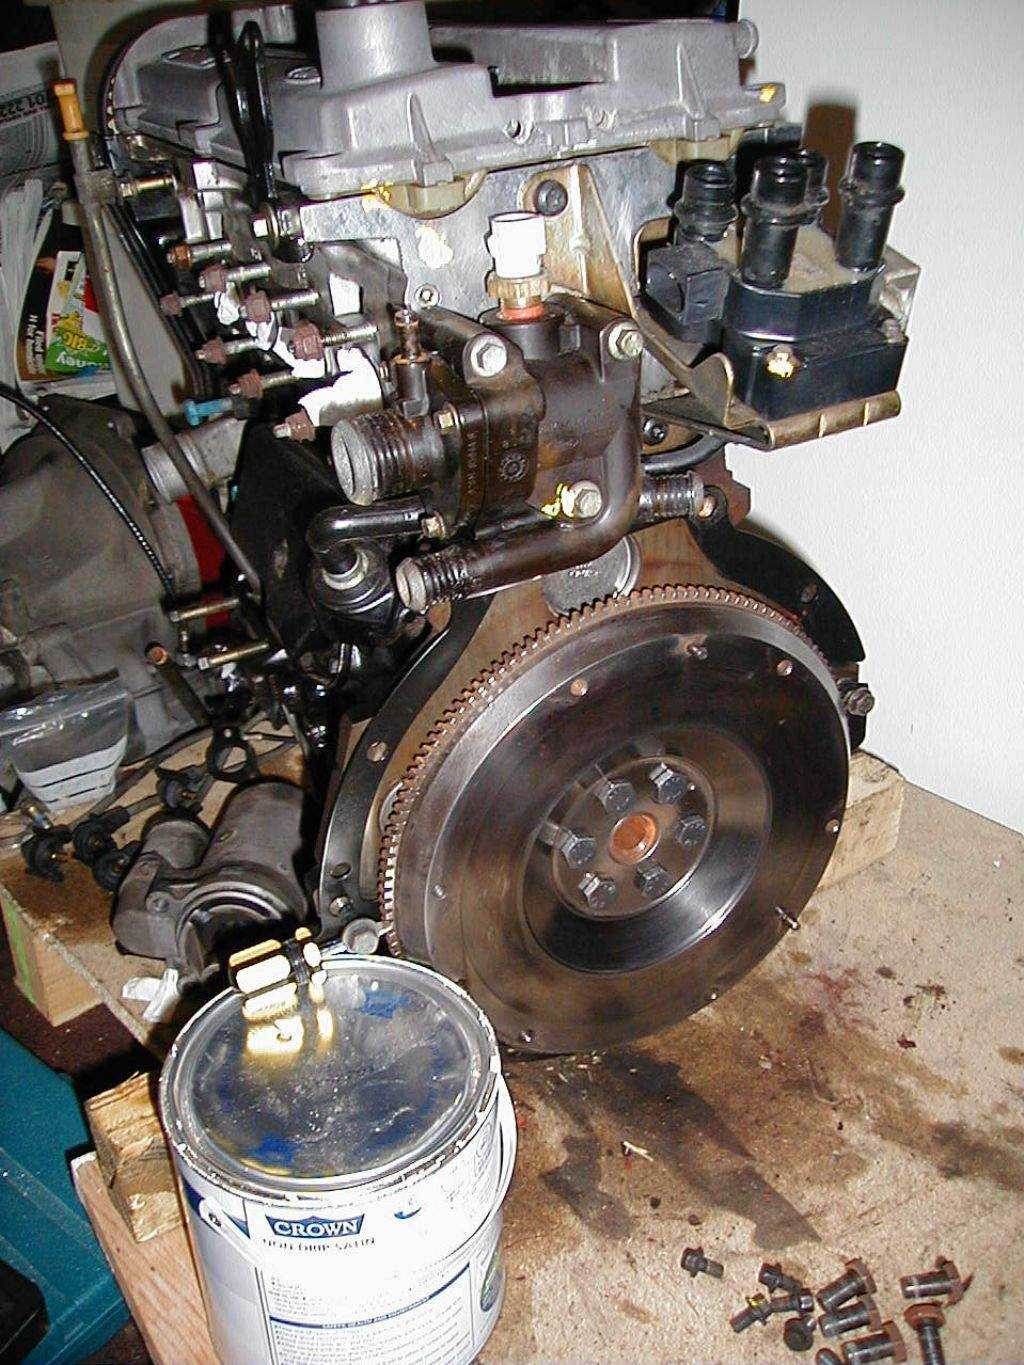
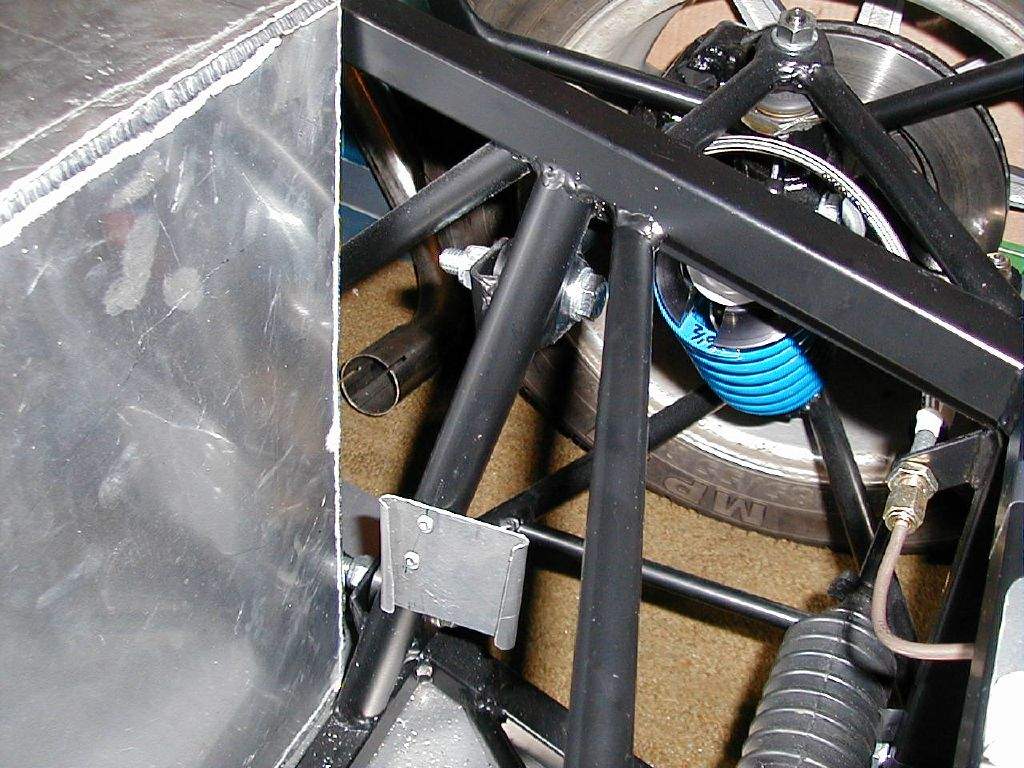
Did manage to get a couple of hours in the garage once back home. Firstly, I bolted the flywheel on using the new bolts, and torqued to 110Nm. This was 'entertaining' to say the least- as well as locking the flywheel, I had to stop the whole engine from falling over as I tried to torque the bolts up! The locking 'mechanism' is visible in the first picture below. I then fitted the clutch, being careful to centralise the friction plate as the cover was tightened down.
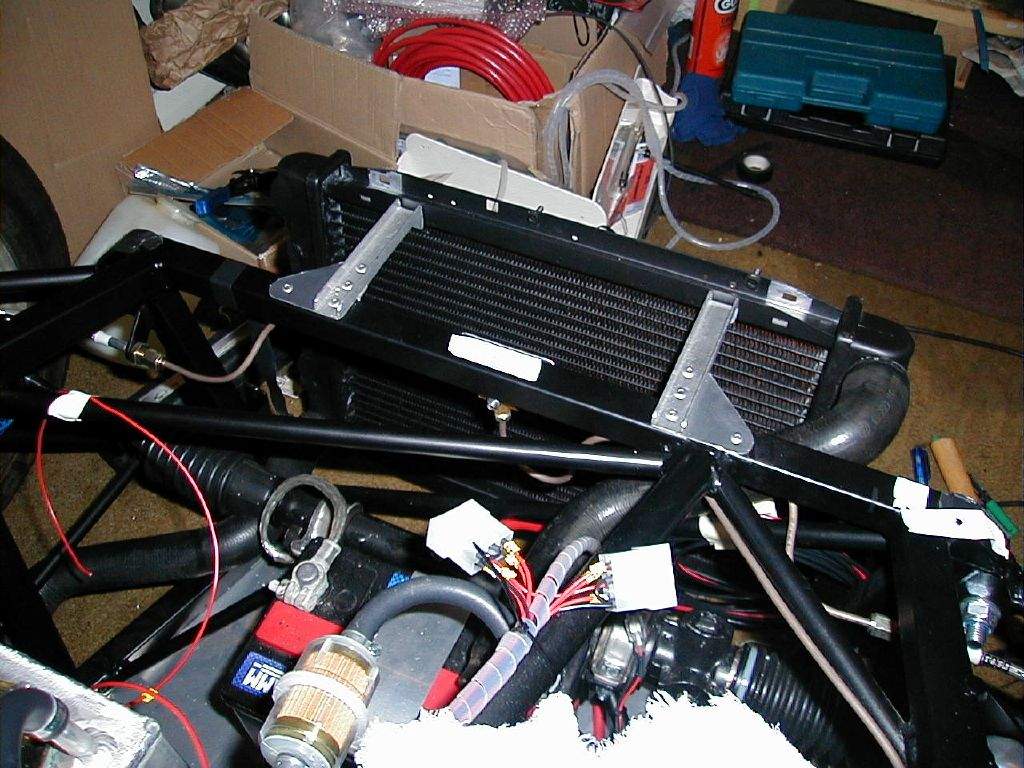
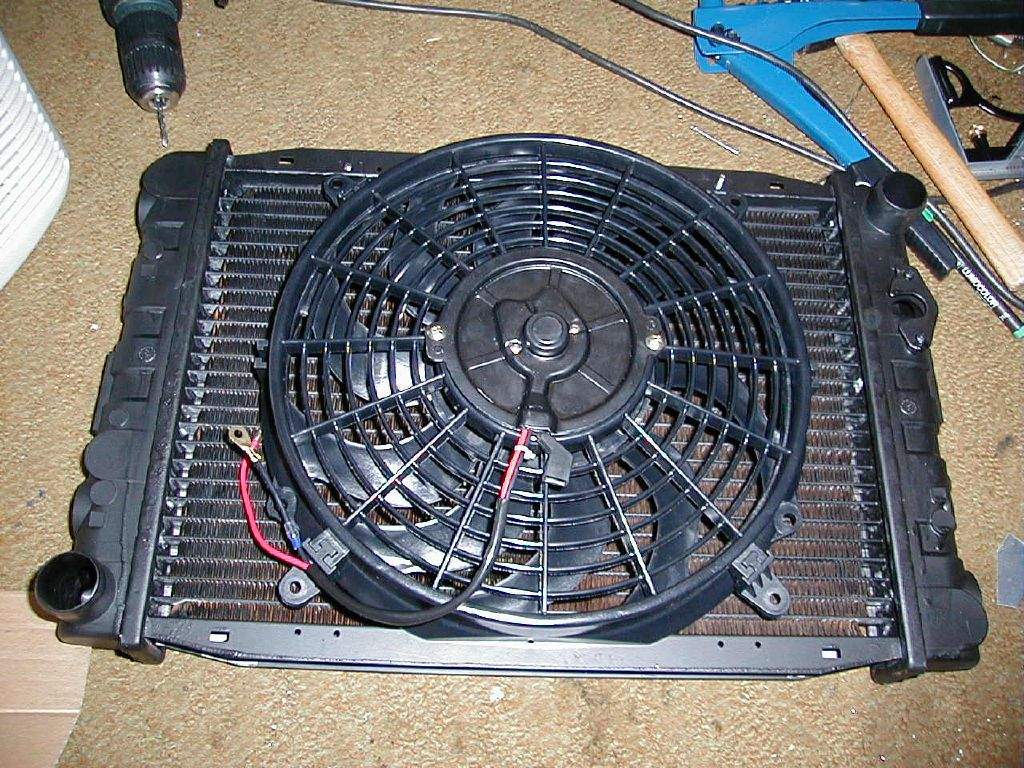
Finally, I looked at how to mount the fan to the radiator. Conveniently, there are some mounting lugs on the fan close to the mounting points I had chose for the radiator. I began making some suitable brackets... 29th February: 4h00m:
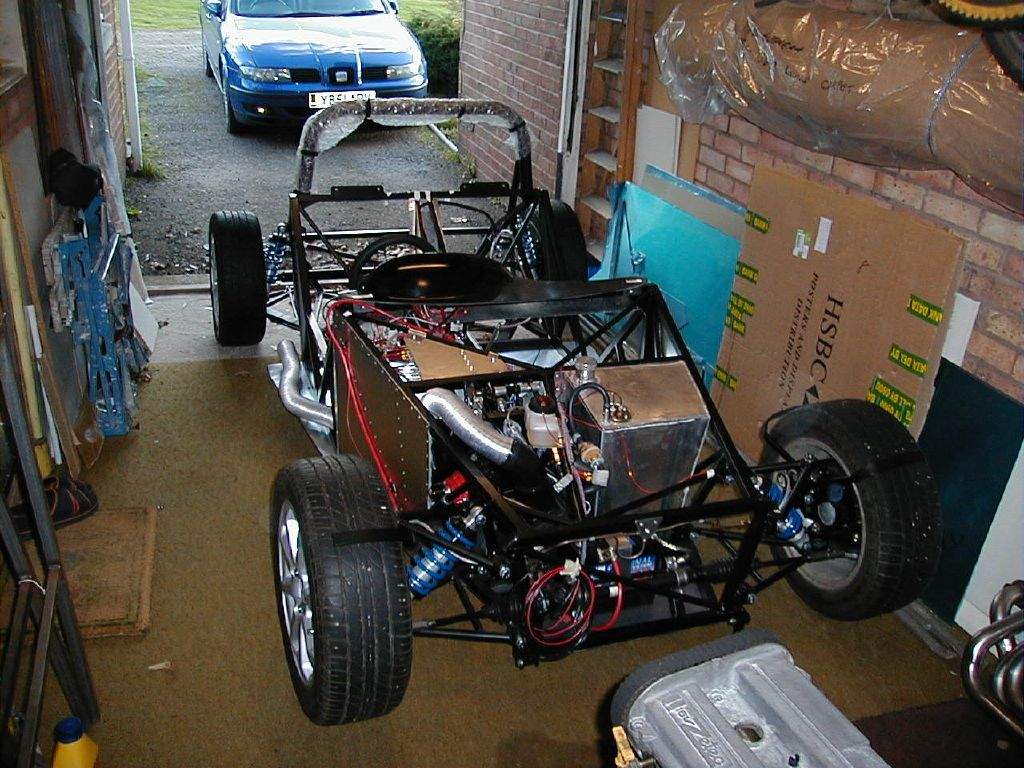
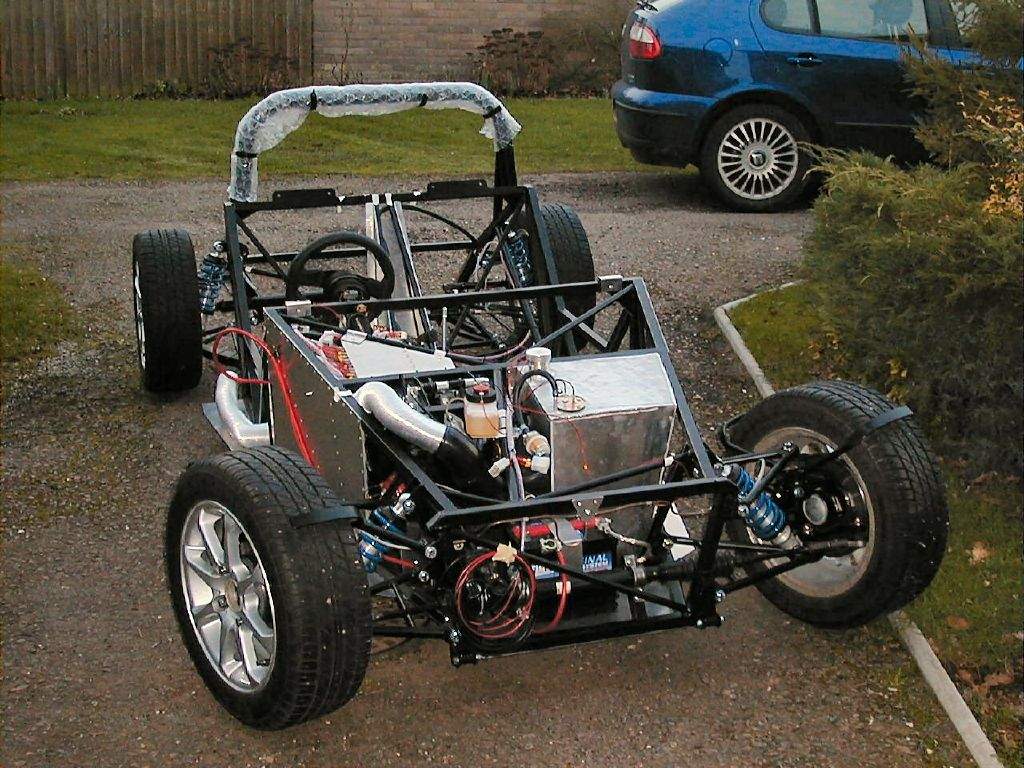
The weather was quite nice today, so I pushed the Mojo out onto the drive and worked outside- it's
good to get some fresh air! I continued working on the
lower radiator mounts, which were also combined into fan mounts too.
Once again the rivnut tool was invaluable- the fan mounts to the brackets with M6 rivnuts (bolted
from the rear), while the rad itself bolts into M4 rivnuts from the front. Once all bolted together, I retrieved the nose (currently residing in the spare
bedroom….) and did a final trial fit. Thankfully all my
measurements had been accurate enough, and it just fitted.
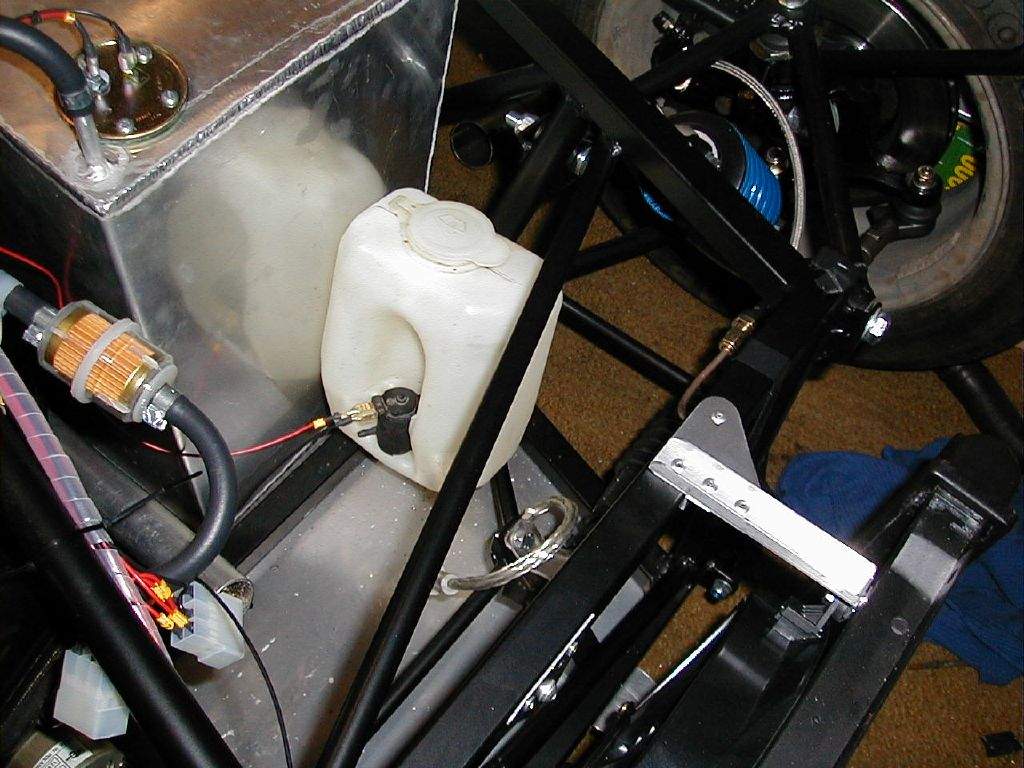
While talking about the nose, I'll talk a bit about the alignment, which is quite difficult without the main tub fitted. From looking at various pictures of other builds, it seems that the lower side edges of the bonnet to the rear of the lamp housings should run parallel with the top chassis rails, and a few millimetres above them (the gap is because the main tub has a return edge moulded to sit on top of the top chassis rails). In terms of fore-aft alignment, I've just been shoving the nose as far back as it will go- this is limited by the fibreglass coming into contact with the upper wishbone mounting bolt, near to the indicator plinths on the nose. Let's hope my assumptions are correct, otherwise I might be re-doing the radiator mounts! With the radiator and fan fitted, I wired up the fan to the cables than I had previously run down to the front of the chassis. Decided to mount my washer fluid tank on the outer chassis upright just ahead of the fuel tank. The tank is from an early Metro, with no rear wash wipe, so has only one pump, which is ideal. A shaping in the rear of the tank enables it to be mounted by sliding onto a bracket in the original Metro installation- I replicated this idea using a small piece of aluminium, which I riveted to the chassis.
Total time spent during February: 39h00m
|
|||||||||||||||||||||||||||||||||||||||||||||||||||||
|
|
|||||||||||||||||||||||||||||||||||||||||||||||||||||||